Dunthorpe Bathroom
Well, I haven't blogged for a few months since I've been hard at work on a wonderful project in the Dunthorpe neighborhood, which includes a highly designed bathroom remodel and several ancillary projects. The home owners recently purchased this house and it was in need of some help in several areas. This house is a gorgeous example of early 20th century design and craftsmanship, featuring several unique items such as a beautifully designed and constructed fireplace. In addition to refinishing the hardwood floors and new paint throughout, this home was in dire need of a new master bathroom. The original bathroom was split into 2 rooms, very cut up and choppy with only 1 vanity.
Here are a few images BEFORE demo:


Design
The design for this project is intended to be classic and functional, with several modern twists. We started the design assuming that the already small space would be opened up as much as possible, by demolishing any interior walls within the bathroom and capturing that space to maximize the size of the new bathroom. This included a wall between the original bathroom and a small closet, that was to become the new shower, a closet, which is where the new free standing tub would be located and a wall between the two windows, to make one large space. A particularly challenging part of the design was that the best location for the vanity was directly below the only two windows in the space. I proposed the solution of designing some custom gliding mirror hardware, so that the mirrors could be positioned directly in front of the vanity sinks, but covering the window, or moved aside to allow natural light and ventilation in. The hardware was to have classic details, for the otherwise contemporary solution. We also designed a custom furniture style vanity with large open spaces below the sinks for towel storage. The floor material chosen was Carrera marble from a centuries old quarry in Italy. (Michelangelo's statue of David is made from Carrera marble) The marble was to be paired with hand made tile from Ann Sacks for the wainscoting which has an elegant base and cap detail. One of the more challenging details of this project was the proposed linen closet, which turned out to be in a location that intersected with a bearing wall and has an abandoned tile chimney above it. We installed a header and drilled and bolted the tile chimney to a rafter above the linen, then cut the chimney tiles to make room for the linen. Several other details with the linen were not so obvious, such as the casing and sill detail, and locating the rough framing so that the casing aligned correctly with the tile cap.


Insulation
After the rough plumbing and electrical installation and inspection, we proceeded with the insulation. Those who know me know that insulation is one of my favorite parts. I enjoy this part because it's building science at work, and we get an opportunity to do insulation right, which is certainly the exception, not the rule. We opted for Rmax board foam at the vaults, which is fitted snugly and foamed into place. This ensures that the foam board will perform well and allows airflow between the foam board and the roof deck for ventilation. We knocked out blocking at the top of the knee walls, to allow airflow between the upper and lower attic, for additional ventilation. We also installed new roof vents, a service platform (see video) that will allow future access without compromising the insulation, and new insulation throughout the entire upper attic. The exterior walls in the master closet received blown in cellulose, known as a "polar blanket".


Tile
For tile, I called upon a true master tile setter. Our friend Vladamir did an amazing job ensuring that all surfaces were level plumb and square before he installed the tile. This required several layers of floor leveler, in floor heat and then the final layer of hardibacker. Then, in the adjacent master bedroom, we set up a temporary drip pan and tent so that our tile setter could set up his wet saw upstairs and all of the water from the wet saw would get captured in the pan, leaving the floor protected. Details such as this are very important to ensure protect these investments. During the tile ordering, we ran into a challenge with the availability of the 3" hex Carrara marble. When we did the pricing, the material was available in a honed finish, but when it was time to order, we learned that they had sold out. Our solution was to order the polished material and learn how to hone. We picked up a variable speed grinder/polisher and several grinding/sanding pad options and honed the stone until we figured out how to replicate a honed finish. It took several days to hone over 100 sf of the hex tiles, but we pulled it off. Another uncommon detail is the custom stone threshold that has a gentle curve to make an elegant transition between the hardwood floor and the tile. For the wainscotting, the Owner selected a tile by Dirk Elliot with a traditional base and cap and 4x8 field tiles in a brick pattern. The 4x8 tile is slightly larger than the traditional 3x6 found most often. This gives a slightly different proportion and feel. Where we used the Carrera marble with a rectangular shape, we also used a 4 inch module for a harmonious feel. The tile turned out beautiful, absolutely perfect. Thanks Vladamir!


Vanity and Slab
It was a great moment when the vanity arrived. The vanity is a substantial piece in the room and was designed carefully. It is a furniture style vanity with furniture feet and open spaces below the sinks, which was a particularly challenging feat. The rough plumbing had to be located just right to allow for the trap to fit within the cabinet, but still allowing for ample space below for towel storage and to maintain an open feel. In addition, we wanted the top of the slab to align perfectly with the bottom of the first field tile grout joint, which meant that the vanity height had to be perfect to make sure this alignment was perfect. The tile was left out at the top of the vanity to "let in" the vanity slab into the tile wainscoting. This allows to good water management and a seamless joint at the back splash.


The Finishing Touches
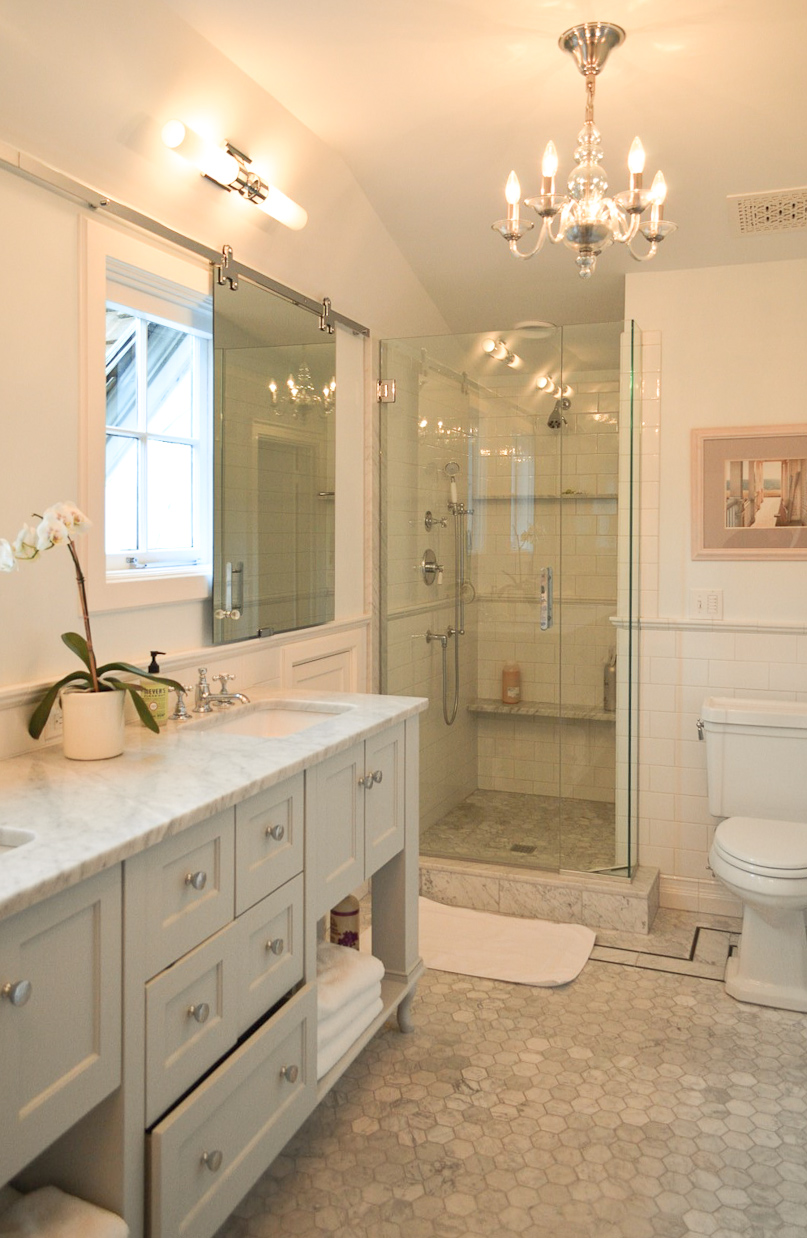
1/16/13 Last week the shower glass enclosure was installed and today, the mirrors arrived. I spent today installing the mirror hardware, which was carefully designed with sheet rubber and rubber grommets to ensure that there would be no contact between the metal hardware and the glass. There were several minor adjustments to be made, but in the end, everything worked out perfectly. The mirrors glide smoothly and finish the space out nicely.


Final photos will be added soon, so check back!


Leave a Comment